



Changing the group a user belongs to in Linux is usually straightforward, but the required commands are not always obvious, especially when you need to add a user to a secondary group. This guide covers the most common scenarios.
Linux user accounts can belong to one or more groups. Groups are often used to manage file permissions, system access, and other privileges. For example, on Ubuntu, users in the sudo group can run commands with elevated permissions.
Some desktop environments, such as GNOME or KDE Plasma, may provide graphical tools for managing users and groups. However, using the terminal is often faster and works consistently across many Linux distributions, so that is the method we’ll focus on here.
Add a New Group
To create a new group in Linux, use the groupadd command and replace new_group with the name you want to use.
sudo groupadd new_group
You’ll usually need sudo because creating groups requires administrative privileges. On distributions that do not use sudo, you may need to switch to the root account first.

Add an Existing User Account to a Group
To add an existing user to a group, use the usermod command. Replace examplegroup with the group name and exampleusername with the user account you want to add.
sudo usermod -a -G examplegroup exampleusername
For example, to add the user geek to the sudo group, run:
sudo usermod -a -G sudo geek
The -a option appends the user to the group without removing them from any other groups they already belong to.

Change a User’s Primary Group
A Linux user can belong to several groups, but one of them is always set as the primary group. The primary group is typically used for the user’s login session and is assigned to new files and folders they create.
To change a user’s primary group, use the usermod command with the lowercase -g option:
sudo usermod -g examplegroup exampleusername
For example, to make example_primary the primary group for the user geek, run:
sudo usermod -g example_primary geek
Remember that lowercase -g changes the primary group, while uppercase -G is used to assign secondary groups.

View the Groups a User Account Is Assigned To
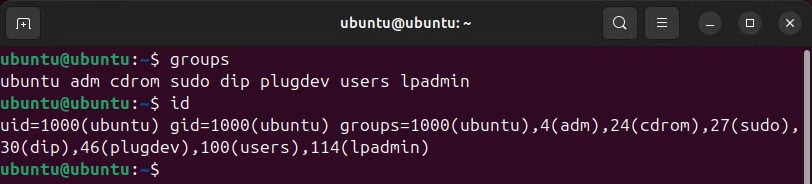
To see which groups the current user belongs to, run the groups command in the terminal.
groups
The command will display a list of all groups associated with that user account.
To see the numeric IDs associated with your user account and groups, use the id command:
id
This displays your user ID, primary group ID, and the IDs of any additional groups you belong to.
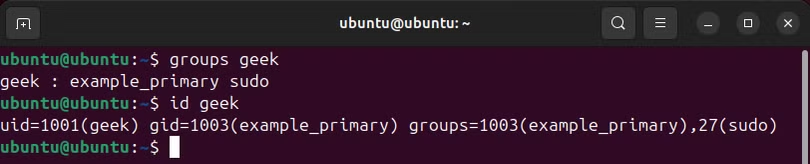
To see which groups another user belongs to, run the groups command followed by the username:
groups exampleusername
You can also use the id command to view the user’s numeric user ID and group IDs:
id exampleusername
In the groups output, the first group listed is usually the user’s primary group. In the id output, the primary group appears after gid=. Any remaining groups are secondary groups.
For example, if example_primary appears as the primary group, that is the group used as the user’s main group.
Create a New User and Assign a Group in One Command
You can also create a new user and add that account to a specific group at the same time. This is useful when setting up accounts that need access to certain files, folders, or services.
Use the useradd command with the -G option:
sudo useradd -G examplegroup exampleusername
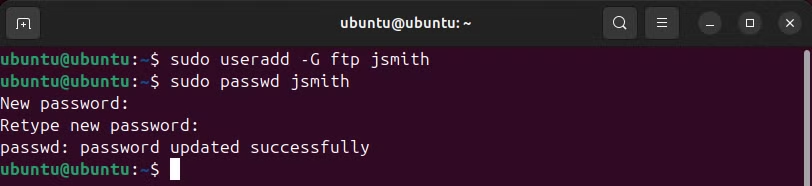
For example, to create a user named jsmith and add that account to the ftp group, run:
sudo useradd -G ftp jsmith
This creates the new user and assigns it to the specified secondary group in a single command.
After creating the user account, you should also set a password for it using the passwd command:
sudo passwd jsmith
You’ll then be prompted to enter and confirm a new password for the user.
Add a User to Multiple Groups
You can add a user to several secondary groups at the same time by listing the group names separated by commas.
sudo usermod -a -G group1,group2,group3 exampleusername
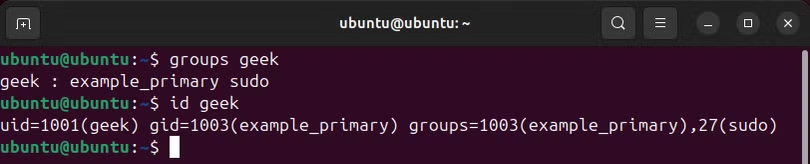
For example, to add the user geek to the ftp, sudo, and example groups, run:
sudo usermod -a -G ftp,sudo,example geek
The -a option ensures the user keeps their existing group memberships while the new groups are added.
You can specify as many groups as you like—just separate them all with a comma.
View All Groups on the System
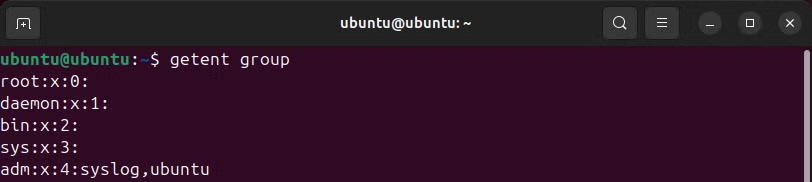
To display a complete list of groups available on your Linux system, use the getent command:
getent group
The output also shows group membership information, including which users belong to each group. For example, if syslog and ubuntu appear under the adm group, both accounts are members of that group.
That should cover everything you need to know about adding users to groups on Linux.
Linux Commands
Linux provides a wide range of command-line tools for managing files, processes, users, networking, storage, and system tasks. Below are some commonly used commands grouped by category.
File Commands
Useful commands for working with files, directories, archives, permissions, storage, and text include:
tar, pv, cat, tac, chmod, grep, diff, sed, ar, man, pushd, popd, fsck, testdisk, seq, fd, pandoc, cd, $PATH, awk, join, jq, fold, uniq, journalctl, tail, stat, ls, fstab, echo, less, chgrp, chown, rev, look, strings, type, rename, zip, unzip, mount, umount, install, fdisk, mkfs, rm, rmdir, rsync, df, gpg, vi, nano, mkdir, du, ln, patch, convert, rclone, shred, srm, scp, gzip, chattr, cut, find, umask, wc, and tr.
Process and System Commands
These commands can help you manage processes, users, permissions, system information, startup tasks, and shell activity:
alias, screen, top, nice, renice, progress, strace, systemd, tmux, chsh, history, at, batch, free, which, dmesg, chfn, usermod, ps, chroot, xargs, tty, pinky, lsof, vmstat, timeout, wall, yes, kill, sleep, sudo, su, time, groupadd, groups, lshw, shutdown, reboot, halt, poweroff, passwd, lscpu, crontab, date, bg, fg, pidof, nohup, and pmap.
Networking Commands
For troubleshooting connections, checking network information, transferring files, and configuring network services, common commands include:
netstat, ping, traceroute, ip, ss, whois, fail2ban, bmon, dig, finger, nmap, ftp, curl, wget, who, whoami, w, iptables, ssh-keygen, ufw, arping, and firewalld.
Frequently Asked Questions:
How do I add a user to a group in Linux?
Use the usermod command with the -a and -G options:
sudo usermod -a -G groupname username
Replace groupname with the group you want to use and username with the user account.
What does -a -G mean in the usermod command?
The -G option specifies secondary groups, while -a appends the user to those groups without removing their existing group memberships.
How do I add a user to multiple groups at once?
Separate the group names with commas:
sudo usermod -a -G group1,group2,group3 username
How do I change a user’s primary group in Linux?
Use the lowercase -g option:
sudo usermod -g groupname username
This changes the user’s primary group rather than adding a secondary group.
How can I check which groups a user belongs to?
Run:
groups username
You can also use:
id username
The id command shows the user ID, primary group ID, and secondary groups.
How do I create a new group in Linux?
Use the groupadd command:
sudo groupadd groupname
After creating the group, you can add users to it with usermod.
Do I need to log out after adding a user to a group?
In many cases, yes. The user may need to log out and sign back in before the new group membership is recognized in their session.
Conclusion:
Adding a user to a group in Linux is a simple way to manage permissions and control access to files, directories, and system features. The usermod command lets you add users to secondary groups, while the -g option can be used to change a user’s primary group.
You can also create new groups, assign users to multiple groups, and verify memberships with commands such as groups and id. Once you understand the difference between primary and secondary groups, managing Linux user permissions becomes much easier.
